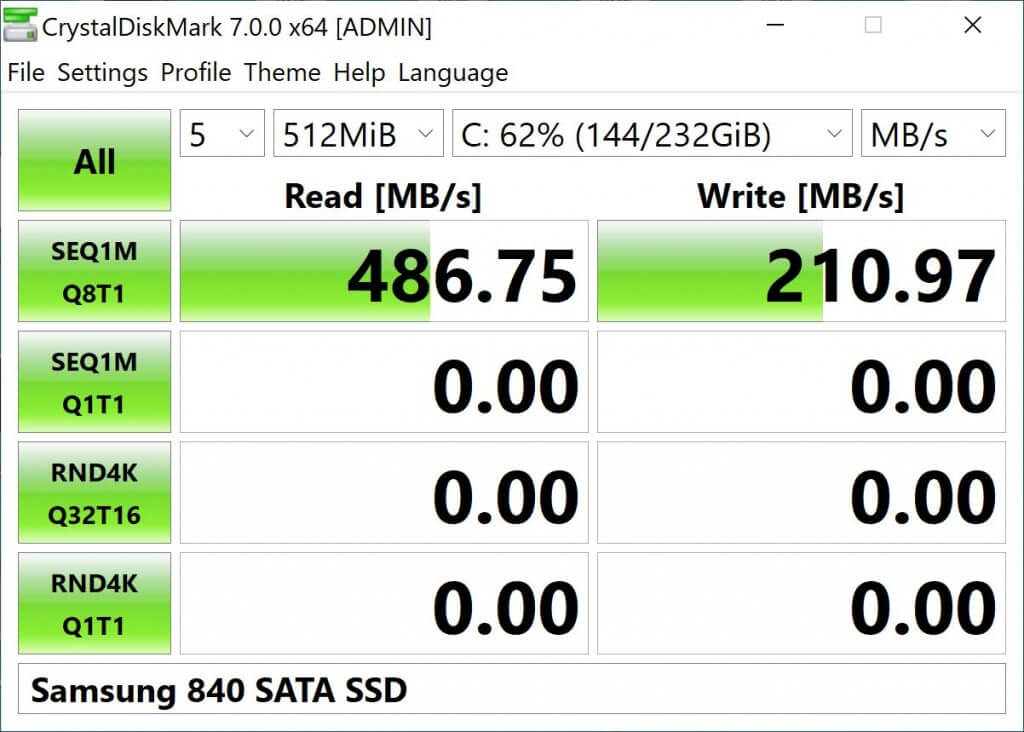
Been contemplating upgrading my old custom tower with a NVMe drive for awhile now, but always put it on the back burner. Finally bit the bullet, after loading certain apps seemed slower than usual. The system already had a Samsung EVO SATA SSD, so it’s not a dinosaur in terms of speed, reaching 500 Mbps read.
I thought this process would be fairly simple: clone drive, enable boot if necessary in bios, but I hit a roadblock right away. The drive wouldn’t show up in the bios as a bootable device. Quick googling produced a workaround using a flash drive and Clover EFI Bootloader, but wasn’t ideal as you needed to forever place a flash drive into one of your usb ports. Shortly after, I came across a forum detailing a way to modify the bios and add NVMe support to boot directly. The write-up was extensive and confusing with so much extra info, but after reading it became clear and wasn’t as difficult as it made it sound. The basic gist was to find a specific part of the bios image and insert a NVMe code into it, then flash it.
I used UEFITool and the process was super fast and easy, but do note that the alpha/beta releases don’t allow inserting code for whatever reason, only official releases. My motherboard had an option that said “Q-Flash” so I used that option and flashing took a minute or so. On reboot, I checked that the NVMe was seen and visible as an option to boot. On first boot, I noticed the Gigabyte logo was still on screen with the white dots rotating below and knew it was working right away because prior using Clover, the white dots were on a black screen. Currently testing everything over a day now, and the system looks solid and I’m amazed that this upgrade was possible.
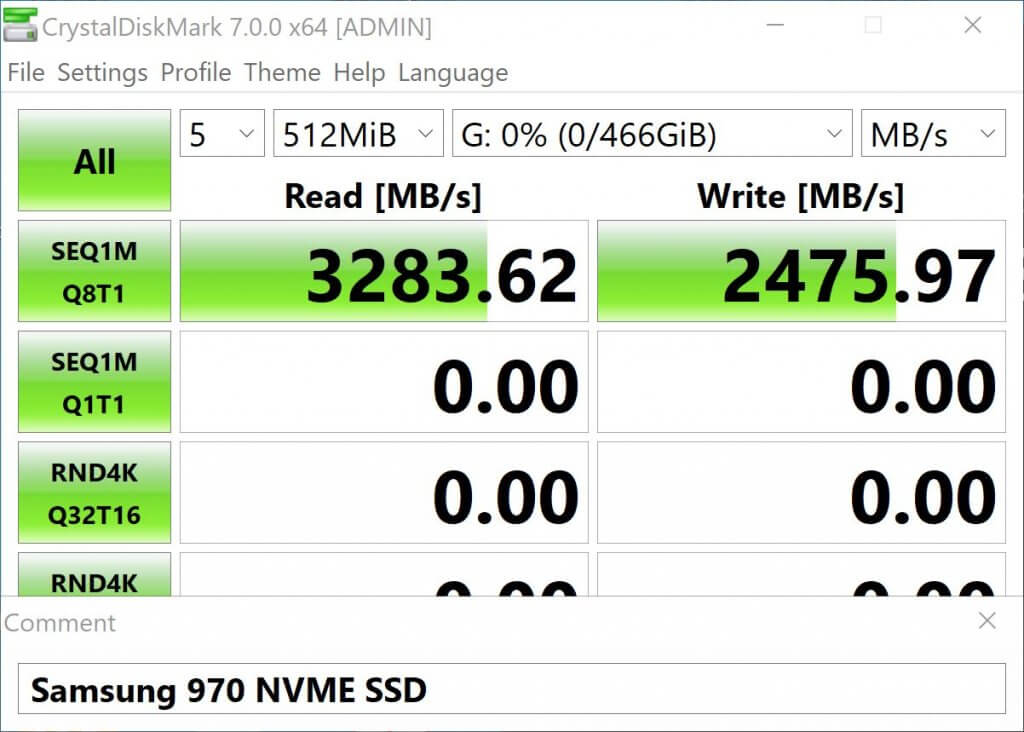
Boy, am I happy with the speed bump. Read+ 6.7x, Write+ 11.7x. These numbers are mostly synthetic and pertain more to large file transfers, but there is a noticeable improvement, reminiscent of the jump from traditional platter drive to SATA SSD.
My specific motherboard is Gigabyte Z77X-UD4H. Funny thing though, another person commented that they had the same motherboard and was able to successfully add NVMe support to his system, but did not attach a BIOS update file for others in the same boat, so this is in part, why I did this write-up, as a resource for others.
Here is the download link for the latest modified BIOS:
https://snrepair.com/downloads/Z77XUD4H_NVMe.F2h
Current Specs:
- Intel Core i5-3570K
- 16GB ram
- Samsung 970 NVMe SSD
- WD 5TB HDD
- AMD Radeon RX 5700 XT
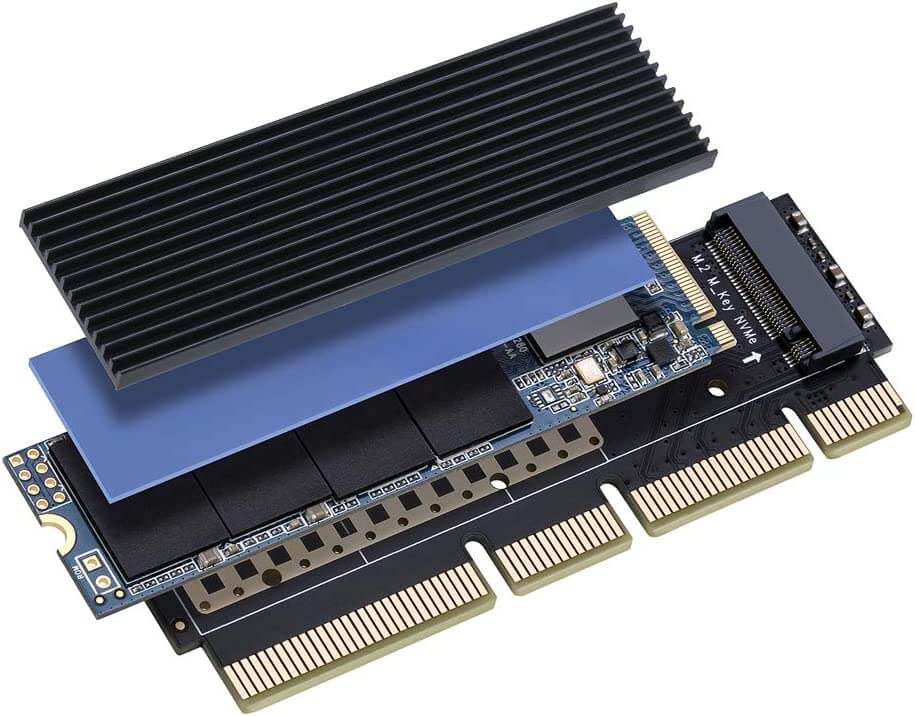
Below is the PCIe to M.2 NVMe adapter used, sold on Amazon for $10, and comes with heatsink and thermal pad. I’ve used this one a few times and the materials are good quality and is the best deal atm.